
How to Enhance a Blurry Photo
You can enhance a blurry image with or without Photoshop. There is no need to persist in using Photoshop for this purpose if you don’t know how to use it; there are several other easy solutions available online and offline. These software and tools can simplify enhancing blurry photos and reduce them to a few convenient steps.
Common reasons for image blur are due to camera motion, subject motion, missed focus, insufficient depth of field, and lens softness. Some issues may be camera-specific or subject-specific, but there are a few things that you can do to eliminate the blur and improve image quality using photo editing software. Now let’s explore how to enhance a blurry photo; read carefully to know everything about the process.
How to Enhance Blurry Photo without Photoshop on Windows?
The number of photo editing tools available can be overwhelming, especially when deciding the most effective software for the purpose.
We have relieved you from hunting for the best as we bring you HitPaw Photo Enhancer – A brilliant photo editing tool that simplifies all the hard work of image-enhancing for you. The following features convey the efficacy of HitPaw Photo Enhancer.
- Highly Automated Image Processing – The AI incorporated in the software automatically optimizes and enhances images once you select a few easy settings.
- High-Quality Output- the processed final Output of images is superior quality without unnatural effects.
- Batch Processing – Multiple photos can be enhanced, saving your precious time.
- User-Friendly Interface – This software is minimalist, and you will not be distracted by dozens of tools everywhere, like in Photoshop.
- Consumes fewer hardware resources compared to other editing tools.
How to Use HitPaw Photo Enhancer to Improve Blurry Image?
- First, you need to download and install HitPaw Photo Enhancer. You can get it from HitPaw’s official website. Besides, if you want to upscale old videos to 4K, you can try HitPaw Video Enhancer.
- After installation, click on the program icon on your home screen to launch it.
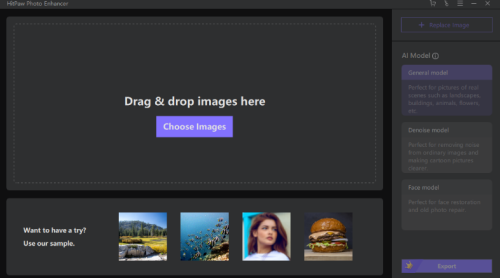
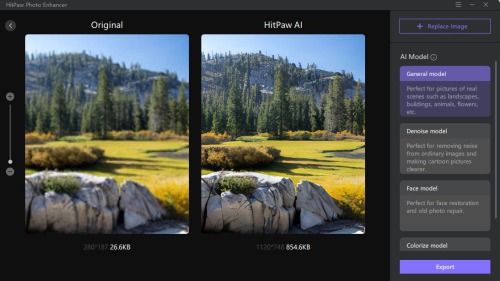
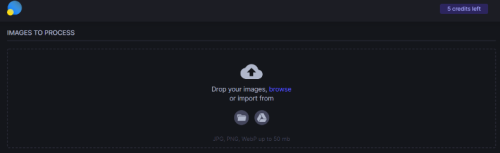
- You may then import the picture you want to modify into the app after it’s opened. You may either drag and drop the image you want or use the button given to choose the file you want. Select the AI model you need.
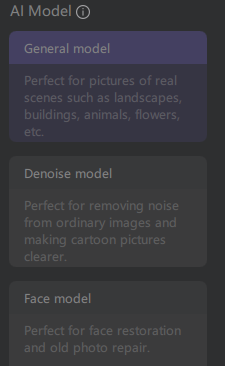
- To process the picture, click the preview button to see how each AI model effect will look on your photo. If the image isn’t what you intended, use change to another AI model to have it reprocessed.
- After that, you export your picture in one of the three formats given by the app. WEBP, PNG, and JPG are the three formats available. Select your favorite design and save your improved image.
This blurry photo Enhancer is your best option to perform easy and fast image enhancements at the click of a few buttons.
How to Enhance Blurry Photo without Photoshop Online
If you can’t find time to download and install software, you can rely on an online tool like Let’s Enhance. It is an AI-enabled online platform with the capability to enhance low-resolution pictures. The specialty of Let’s Enhance is that it can increase image resolution without affecting the quality.
It involves in fully automated processing of photographs. It can expand the relevant proportion without stretching the image to optimize tone, texture, color, and clarity. You can enhance a blurred photo online this way without spending time downloading and installing any software.
Features of Let’s Enhance
- It offers cloud storage
- Import and export photos
- Auto-selection is available
- Batch editing
- Collaborative Editing
- various effects and filters
- Enhancement tools.
Steps to Enhance Blurry Photo online with Let’s Enhance
- Log in to your existing Let’s Enhance account or create a new one at letsenhance.io/signup. You may use your Google, Facebook, or email address to sign up
- (You may process up to 5 pictures with a free account)


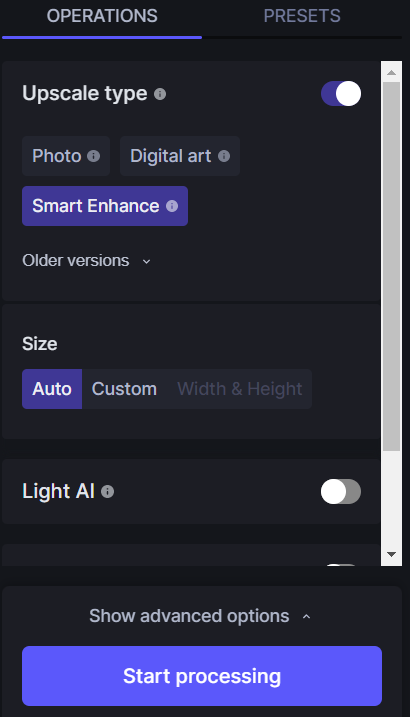
- Depixelize photographs by dragging and dropping them anywhere on the page or selecting them from your computer or phone’s gallery. You may also use Google Drive or a URL to import files. You’ll notice the print resolution and size at 300 DPI to the right of the picture thumbnail.
- Your pixelated/blurred picture will be fixed via Smart Enhance, the default option for the software. It’s as simple as clicking the “Start Processing” button.”When the Light AI toggle is on, you may adjust the image’s lighting and colors.The tone enhance option boosts the contrast and brightness of the picture. Saturation is increased by using a color enhancer.
- Wait till the processing is completed. Then, click on the thumbnail to save the picture to your device.
- Now you have a freshly deblurred picture. You can compare the enhancement with the original.
The above-detailed steps highlight enhancing a pixelated photo without using an offline editor. You can upload the image online, process it for enhancement, and then finally download it to the device of your choice.
How to Enhance a Blurry Photo on iPhone without Photoshop?
Ever wondered about using your iPhone to fix the blurriness of a favorite photo? We got you covered in this section. We can use an image enhancer app like Remini to refine the problematic image in a few easy steps.
It uses Generative AI technology to improve blurry/pixelated and low-resolution photographs, implementing photo enhancing techniques such as shake Reduction and Unsharp Mask. Remini resorts to an existing database of images that replaces blurry content with fresh, crisp, and lucid versions for more difficult image corrections.
Remini Features
- Convert a low-resolution snapshot of a face into a high-resolution image.
- Transform ordinary pictures and selfies into amazing, influencer-style images.
- Restore an aged, fuzzy, or scratched photograph.
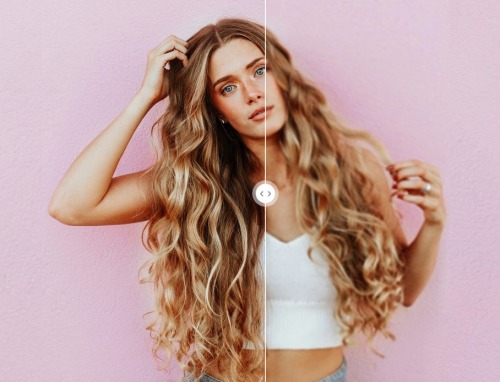
- Use before/after comparisons to create viral content that will be shared.
Steps to Enhance a Blurry Photo on iPhone Using Remini

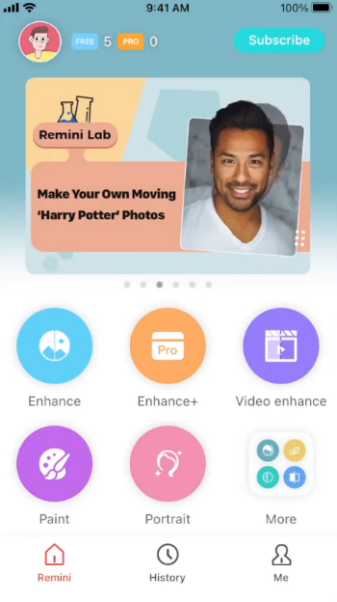
- Launch Remini and choose Enhance
- On your phone, find the photograph you wish to improve.
- To process it, click the Red Check Mark. After the advertisement, the final result will appear (when using the free version).
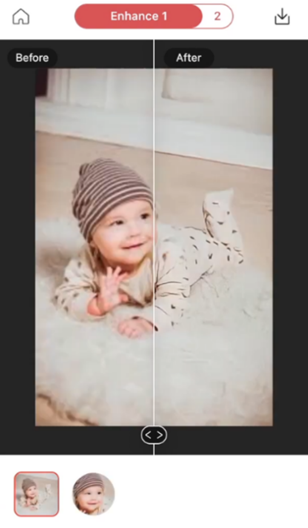
- The Before and After interactive screen will appear next. You may either download or share the picture at this point.
Remini is one of the best AI photo enhancer apps to fix blurry images using your iPhone.
How to Enhance a Photo that is Blurry with Photoshop?
Photoshop is the panacea for all photo complications. The only drawback is that Photoshop is not beginner-friendly like the above-mentioned AI-powered solutions. You will have to improve picture quality using its sophisticated tools manually. It can be time-consuming and requires a lot of skill.
The newer versions of Photoshop have incorporated certain AI features that you can use to relieve yourself from the troubles of fine-tuning pictures to perfection. However, Photoshop is not a total AI-image enhancer; therefore, you will not find the editing tasks straightforward compared to HitPaw Photo Enhancer. If you prefer manual or semi-automated image enhancements, you can go for Buy Photoshop.
Steps to Enhance a Blurry Photo with Photoshop
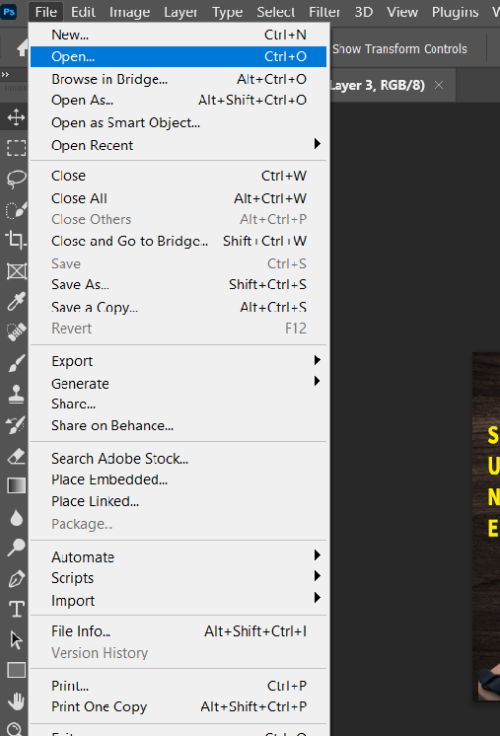
- Open Photoshop. Select the blurry picture by clicking “File” and then “Open.”
- To duplicate the background layer, drag it down to the “New Layer” button. The symbol looks like a sheet of paper and is located near the bottom of the Layers panel, second from the right.
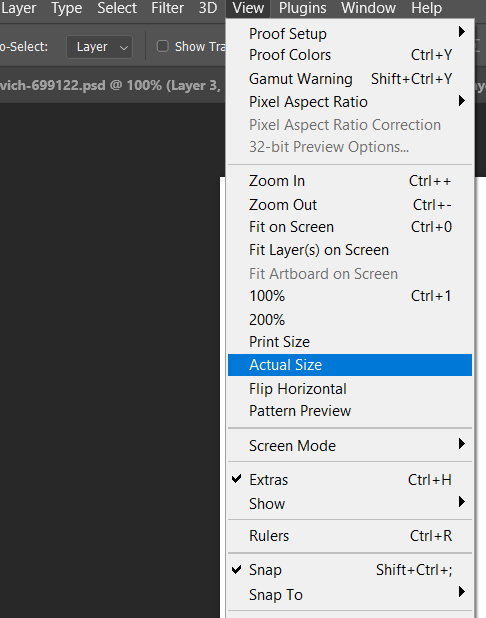
- Choose “Actual Pixels” by selecting view
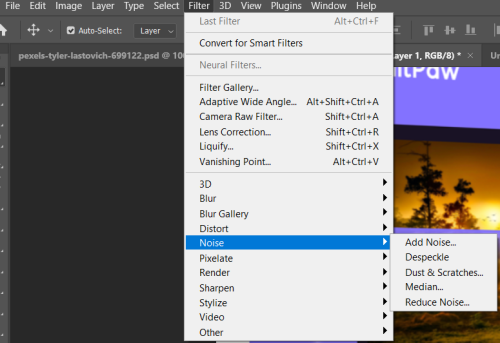
- Inspect noise in the picture, such as random white pixels or JPEG artifacts. Before sharpening the photo, remove as many erroneous pixels as possible since sharpening might accentuate image noise. “Filter,””Noise,” and “Reduce Noise” are the options. Select “Remove JPEG Artifacts” if the picture is blocky or pixelated due to storing it as a low-quality JPEG. “Strength,””Preserve Details,””Reduce Color Noise,” and “Sharpen Details” may all be tweaked. To apply the “Reduce Noise Filter” to particular color channels, go to “Advanced.”
- To see more of the image on the screen, select “View,””Print Size,” or “Zoom Out.”
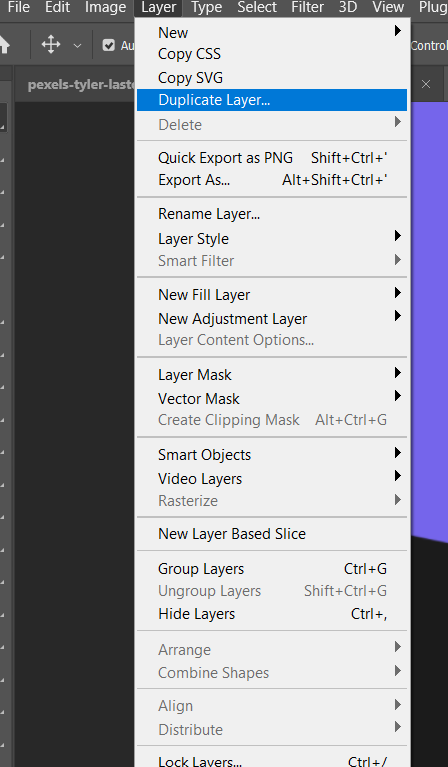
- Duplicate the layer with the decreased noise by selecting “Layer” and “Duplicate Layer.” Click “OK” once you’ve typed in “High Pass.”
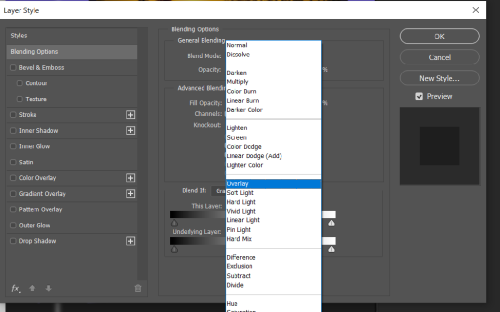
- Change the “High Pass” layer from “Normal” to “Overlay” in the “Blending Mode” drop-down menu at the top of the Layer panel.
- Select “High Pass” from the “Filter” and “Other” options.
- Use the slider to change the filter’s “Radius.” Sharpening is more pronounced as the radius is increased. Keep an eye on your picture in the document window to see how the filter changes the look. Click “OK” to apply the filter after you’re through seeing the results.
- Click on the opacity and lower it to lessen the sharpening effect.
- Choose the layer you want to select under the “High Pass” Layer.
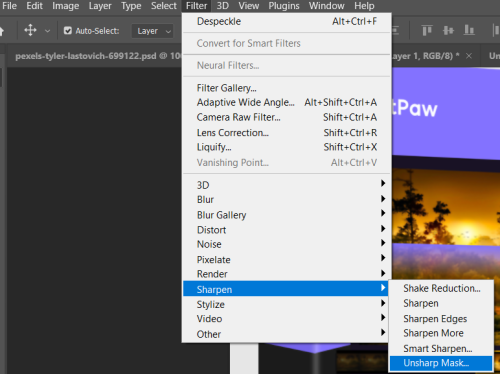
- Then choose the “Unsharp Mask” option under “Filter” and “Sharpen.” The image’s fine details are brought out when the Unsharp Mask filter is used. Make the necessary changes to the values to correspond to your desired picture. The “Amount” and “Radius” of pixels in a high-resolution image must be increased. Unsharp Mask will be applied if you click “OK.”
Conclusion
This article explored how to enhance a blurry photo with and without Photoshop. It includes both online and offline methods of enhancing blurry/pixelated images. As you can see, the total AI solutions like HitPaw Photo Enhancer can make your editing pretty convenient.
You can rely on Photoshop if you are willing to spend some time before the screen and learn how to use tools to improve photo clarity. The online methods can also help you get your Output fast as you can edit an image without downloading any software.