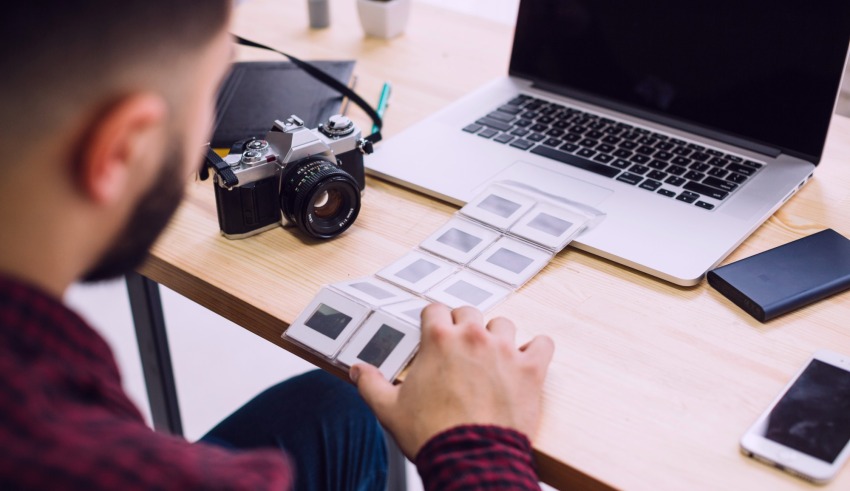
In the age of smartphone photography and social media, capturing and sharing moments has become an integral part of our daily lives. However, not every snapshot comes out picture-perfect.
We often encounter low-quality pictures that lack sharpness, suffer from poor lighting, or appear grainy. But thanks to advancements in image editing technology, it is now possible to transform such pictures into visually stunning masterpieces with just a few clicks.
Read this article to discover simple techniques to enhance picture quality and make them look better than ever before.
Part 1. What Causes of Low-Quality Pictures?
It’s important we understand the causes of low-quality pictures before we dive into the techniques to fix them. A few of these reasons are mentioned below;
⦁ Compression
Compressed images usually undergo data reduction, resulting in a loss of detail and clarity. So, if your picture has undergone compression, chances are it will lose its quality. It is advisable to use a less aggressive compression algorithm or reduce the compression level when compression your images.
⦁ Image Resizing
Another reason for low-quality picture is image resizing. Yes, just like compressing, resizing an image to a smaller resolution may cause loss of details and a decrease in overall quality. Conversely, enlarging a small image to a larger size can result in pixelation and blurriness.
⦁ Camera Errors
Just as we all know, camera quality has a significant impact on picture quality. So, if your camera has issues like improper exposure, white balance, or incorrect focus settings, it might result in poorly captured images.
⦁ Unfocused Shots
Unfocused shots are a frequent cause of low-quality pictures. When you fail to focus the camera correctly on the subject, the resulting image appears blurry or lacking in sharpness.
⦁ Shaky Camera
Shaky camera movements can also cause low-quality pictures. When the camera is not stabilized, the captured images can be blurry due to motion blur.
⦁ Incompatibility Problem
Incompatibility problems usually occur when transferring images between devices or using incompatible software for image processing. This can lead to image degradation or loss of quality.
Part 2. Efficient Methods to Fix Low-Quality Pictures Within A Few Clicks
After trying a variety of techniques to fix low-quality pictures, we’ve curated the most efficient methods to carry out the operation quickly and easily.
Method 1. Increase Picture Quality with Photo Repair Tool
You can quickly increase picture quality using the Wondershare Repairit Photo Repair. The tool offers features that help you to get rid of errors, such as viruses, blurriness, and lots more causing your picture to appear in low quality.
Also, it boasts a high repair rate compared to regular photo repair tools, and it’s compatible with a wide range of storage devices, including camera, mobile phones, USB flash drives, etc.
Key Features
⦁ High compatibility with both Mac OS and Windows.
⦁ Supports the repair of images in various formats, including JPG, PNG, CR3, CR2, etc.
⦁ It can repair damaged visions photos with any level of corruption, like black photos, grainy photos, and lots more.
⦁ Simultaneously repair multiple damaged photos without tampering with their quality or integrity.
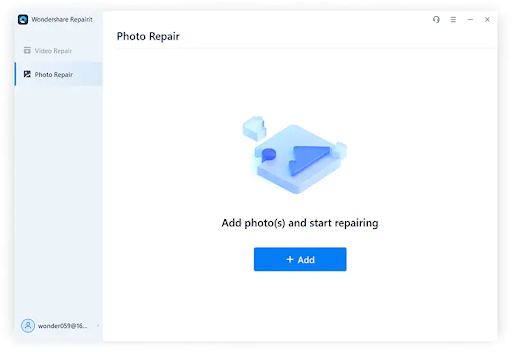
Step 1: Download and install Wondershare Repairit Photo Repair Software on your PC or Mac and open it.
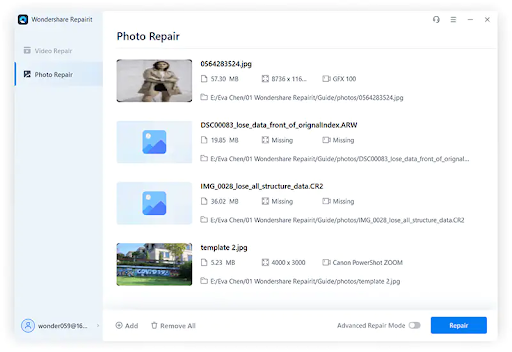
Step 2: Select Photo Repair option. Click the Add button to upload the picture(s).
Step 3: Click the Repair button at the bottom right corner to begin the photo repair operation.
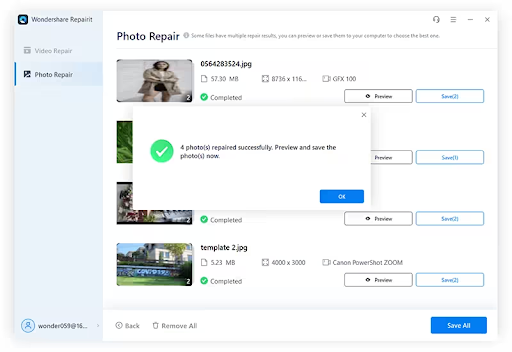
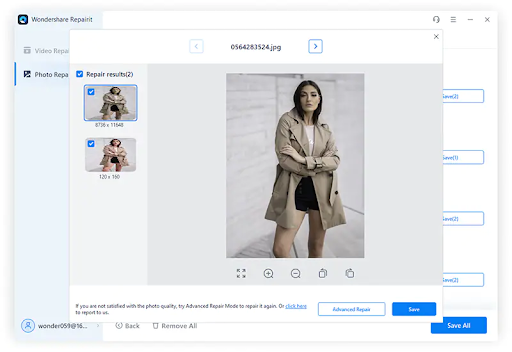
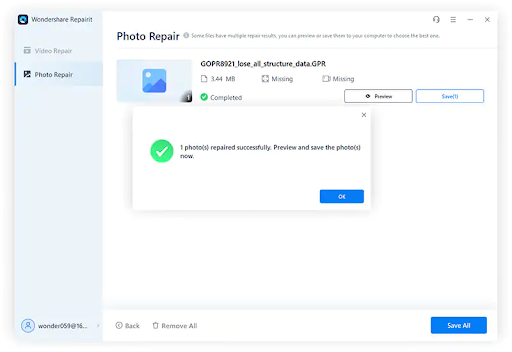
Step 4: A pop-up should appear on your screen displaying the progress of the operation. After that, preview the repaired photos and save them to your local storage.
If the photo is badly damaged, use the following procedure to use Repairit Photo Repair Software Advanced to get the job done;
⦁ Click Advanced Repair and upload a Sample photo. The Sample Photo should be a good version of the photo you intend to repair and it must be created with the same device in the same format.
⦁ Next, click on the Repair button to start the advanced repair process. This will take only a few minutes to complete.
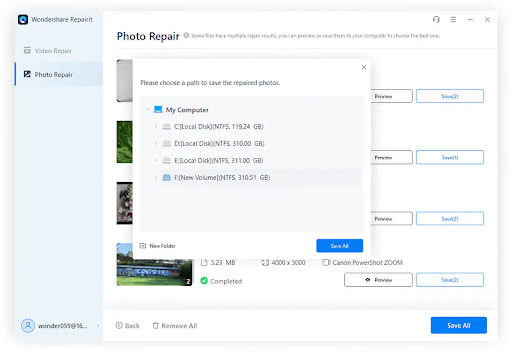
⦁ Preview the photos and save them to a desired location.
Method 2. Enhance Picture Quality With Photoshop
Photoshop by Adobe Inc is one of the top-leading that can come in handy to fix different aspects of your images. It supports efficient features that facilitate different operations, including increasing picture quality, and you don’t need any technical knowledge to be able to operate it.
Step 1: Install the Photoshop app on your computer and launch it.
Step 2: Open the Image you intend to repair in Photoshop. Then, navigate to the Image tab and click on ‘Select Image Size’.
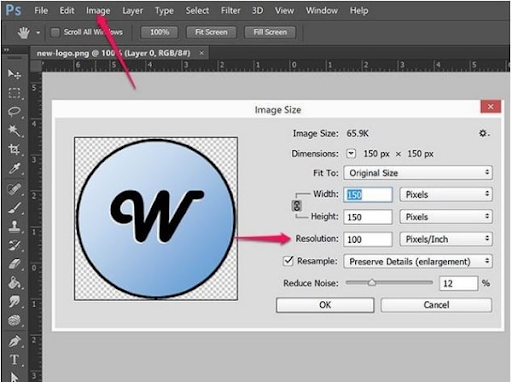
Step 3: Select a preferred value for your image height and width. Then, click Ok.
Step 4: After that, find and select Filter and Blur options. Then, click the Gaussian Blur option and slide to a suitable range.
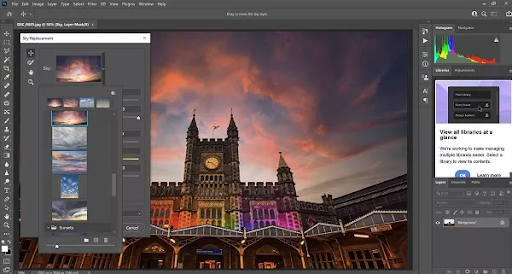
Step 5: Click OK and navigate to the Filter and Sharpen option. Then, choose the Unsharp tool and slide it to get a desired results.
Step 6: After that, save your image to your device’s local storage.
Part 3. Can I Increase Picture Quality Online?
Yes, you can increase picture quality online. An online photo repair tool like Wondershare Repairit Online Photo Repair can come to your rescue when you have pictures with bad quality. It allows you to enhance picture quality online for free using advanced AI algorithms. It does not matter how your photo might have gotten damaged, it’ll help you recover its quality flawlessly.
Key Features
⦁ It’s 100% free.
⦁ Boasts the best security encryption for safe and secure photo repair process online.
⦁ It’s compatible with various image formats, including JPG and PNG.
⦁ The repair process is fast and straightforward.
⦁ It fixes videos online without damaging the original quality or integrity.
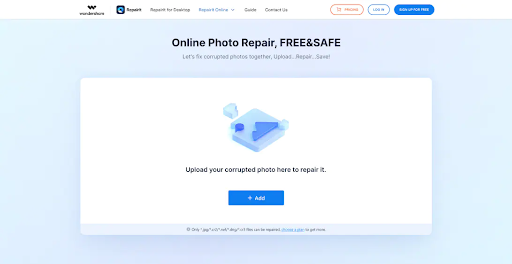
Step 1: Open “Wondershare Repairit Online Photo Repair tool” in your browser.
⦁ Click the plus Add and upload the damaged photo(s).
Step 2: Repairit Online Photo Repair supports two repair modes to choose from. You can either choose the Quick Repair mode to perform a quick repair or Advanced Repair mode to perform an in-depth repair.
For Quick Repair
⦁ Go to the bottom right side of your screen and click on the Repair button. This will immediately perform a quick repair on the damaged photos.
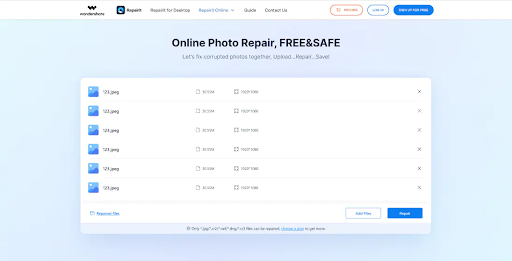
For Advanced Repair
⦁ Click Upload Sample Photo to upload a sample photo for each picture you want to fix.
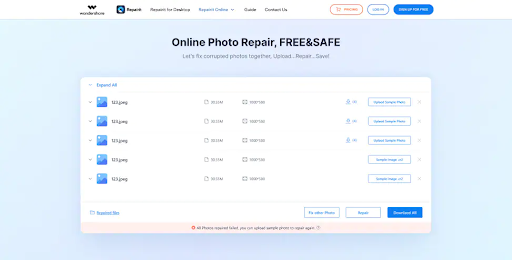
⦁ Click the Repair button to start fixing the low-quality picture.
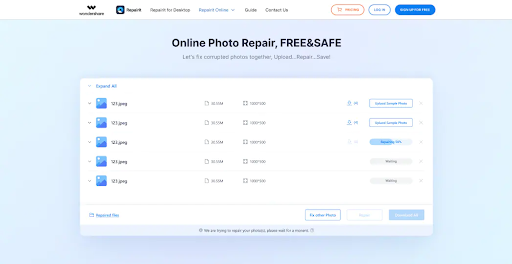
Step 3: The repair process should not take more than a minute of two. Afterward, preview the repaired photo(s) and save them to your device using the Download button.
Conclusion
Enhancing the quality of a low-quality picture is a task that can be accomplished with the right tools and techniques. By following the steps outlined in this article, you can significantly improve the clarity, sharpness, and overall appeal of your images. Besides, you don’t need to be tech-savvy to operate.